Welcome to your new WordPress website! Here are important notes on how to care for your custom WordPress theme and a general introduction to the key areas of your website. For questions beyond the scope of this document please contact Paone Creative and we will be happy to help you find a solution.
Overtime, WordPress & the third party services on your website will update and evolve. The details in this document will need to be updated too. Don’t be alarmed if some instructions become outdated - however the overall guidelines will stay true.
Maintenance & Update Procedure
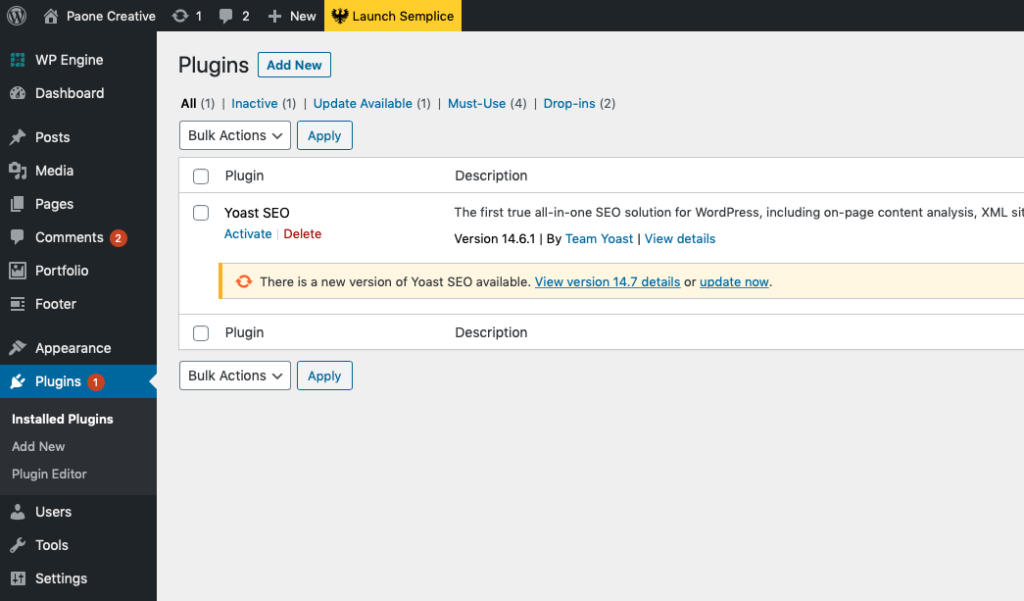
When you see an update notification - PLEASE DO NOT UPDATE. These updates should be completed by a WordPress expert or advanced user - contact us or another WordPress expert for help. If not completed properly, updates can disable or break your website or cause loss of data. Also be sure to backup your website before any updates are performed.
If your website is not kept up-to-date you are susceptible to security complications & malicious attacks (aka viruses or hackers that can cause harm to your website).
Items that will require updating: WordPress Core, WordPress theme, plugins and other third party services. Some third party services might require payment to update.
Admin Responsibilities
Hosting
We recommend WP Engine to host your WordPress website as it provides a fully managed WordPress hosting service. If you have any hosting related issues or questions contact their 24/7 customer support. If your site ever appears offline or goes down WP Engine support should be your first call.
- Access support online: https://my.wpengine.com/
- Directly from WordPress dashboard go to tab: WPEngine > User Portal
- By Phone: 1-877-973-6446
Once you have logged in, you can open a support ticket or live chat.
Backups
It is important to backup your website daily + before major updates. This gives you the option to restore your website from a previous backup if a change or edit causes harm to your website.
It is also a good idea to keep an archive of your website externally (a third-party service, on a computer, disk or usb). This can be done based on the frequency that you update or publish content online. This is not a website restore point but rather an extra layer of protection.
If your site is hosted on WP Engine, they will keep an archive of daily backups (1 for the last 30 days). You can also create a Restore Point before major updates.
Security
If your site is hosted on WP Engine, they will monitor and prevent malicious attacks from the outside with a firewall and malware scanning.
If you own a high traffic website or are having issues with spam and malicious attacks then we recommend you add extra security and monitoring to your website with Sucuri. Sucuri monitors your website for spam, hackers and malicious attacks. If you purchase an account (or if you receive an email warning from your existing account) then visit https://sucuri.net/ and login to remove the threat or talk to their support.
Users
Passwords: Users on your wordpress website are a huge security risk. It is important that every user has a complex password with a mix of upper/lower case letters and symbols. It is also a good habit to reset all user passwords each year.
Roles & Permissions: Be mindful of user capability settings. Choose the minimum access level needed for each user. This will help avoid malicious attacks on your website. Here is a chart to help you determine which role to give a new user, it displays the default WordPress role and capabilities.
*On some WordPress sites we customize regular roles or add new ones. See your custom tutorial to learn more.
Back End Overview
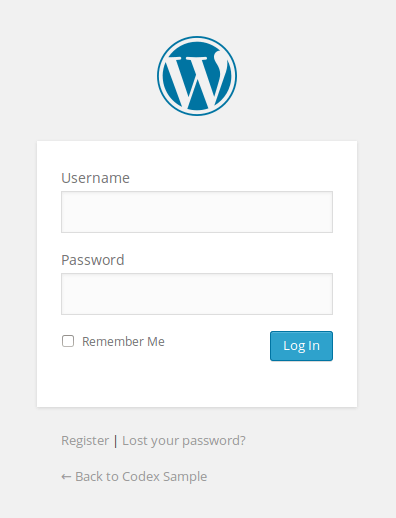
Once you receive access to your website begin by logging into the administration area (back end). Visit your site's login page by typing 'yourdomainname.com'/wp-admin into any modern web browser (Google Chrome is preferred).
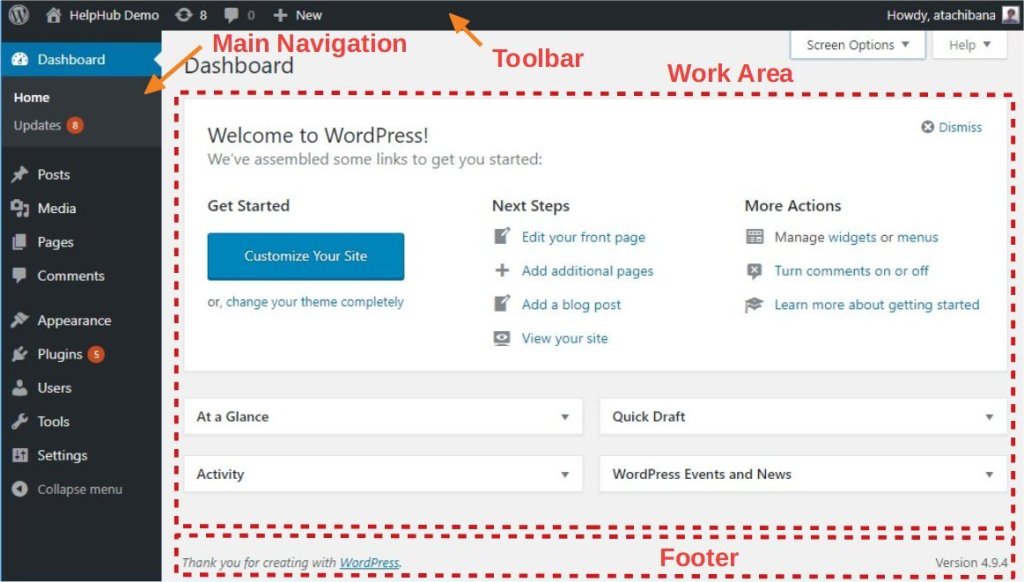
After logging in you will be taken to the main Administration Screen called the Dashboard. The bar across the top of your browser is called the toolbar.
- Click on your site name; it’s a link and it will take you to a (front end/ public) view of your new WordPress site.
- The front end layout you are looking at is defined by a WordPress Theme. It is the appearance of your website, styling the look of the site and the framing of the content.
- In the toolbar, click on your site name again to be taken back to the administrative area.
Administrative Menu
The left side of the screen, holds the main navigation menu detailing each of the administrative functions you can perform. Move your mouse down the list and sub-menus will “fly out”. The following are areas that should only be edited by an experienced WordPress user:
- WPEngine > General Settings/Legacy Staging
- Genesis
- Appearance > themes, customize, editor
- Plugins
- Tools
- Settings
- Custom Fields
- Divi
*If you are not confident in what you are editing, stop and ask for support from an experienced team member or WordPress developer. Errors can cause serious harm to your website.
Pages & Posts
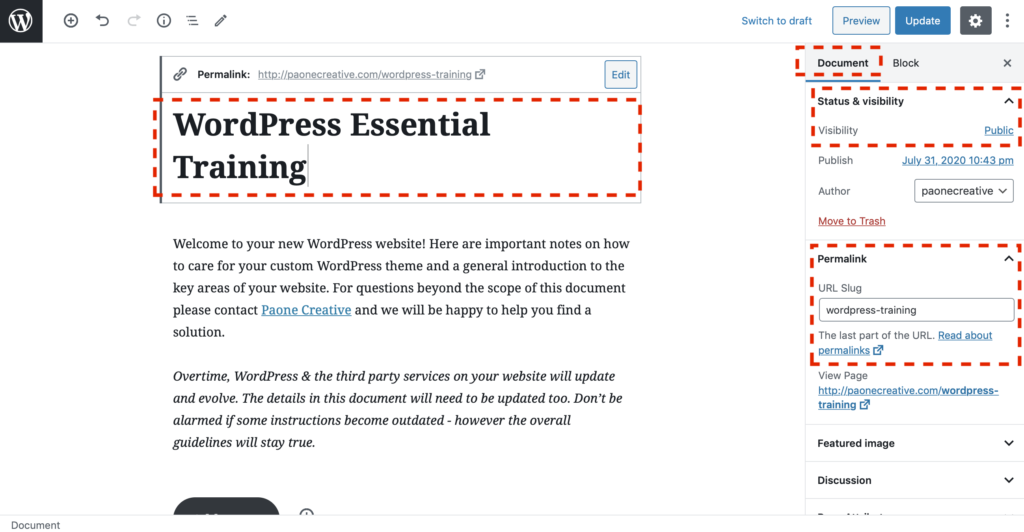
Title & URL
Every page/post needs a title, even if not visible to the public. Add the title of the article in the space allocated.
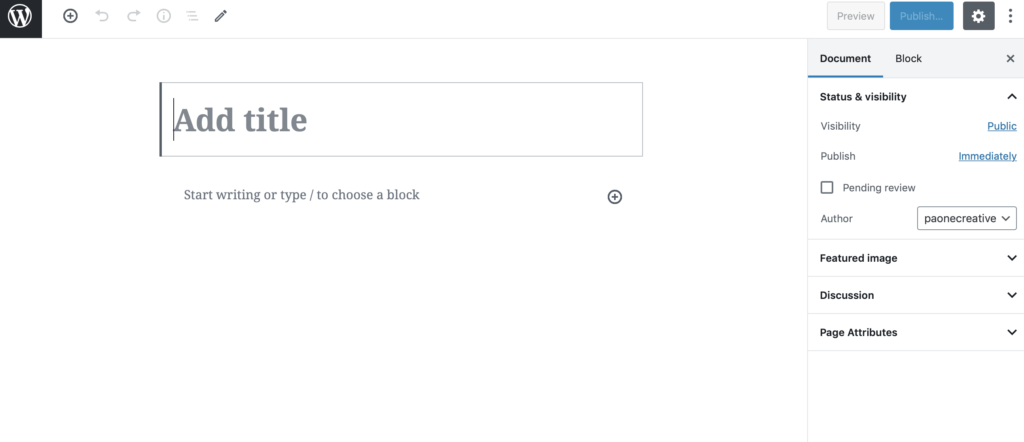
WordPress will then generate a unique URL slug for that post/page based on the page title you gave it.
Title: Love My Cat
URL slug: /love-my-cat
URL Permalink: yourdomain.com/love-my-cat
You can easily edit the page title at a future date. It will not affect the URL slug, originally given to the post.
If you would also like to edit the URL slug, you can do this manually by editing the page/post Document > permalink > URL Slug. Consider the effects of doing this! The original link will now be broken, so any content referrenced on your website or others could be taken to the wrong place (redirects are recommended).
Status & Visibility
The status of a given post/page determines the visibility, handling and access. The most commonly used status settings are:
- Draft: Incomplete post viewable by anyone with a user role higher than contributor (author, editor, admin).
- Publish: Viewable by everyone (the public).
- Private: Viewable only to WordPress users at Administrator level.
- See the full list of status options
Editing
Page/post editing by default uses the WordPress Block Editor. Some WordPress themes might also use a page builder plugin (e.g. Divi, SiteOrgin, Elementor, Semplice).
Specific tutorials will have been created for you on how to edit you pages. For general information you can use the following resources:
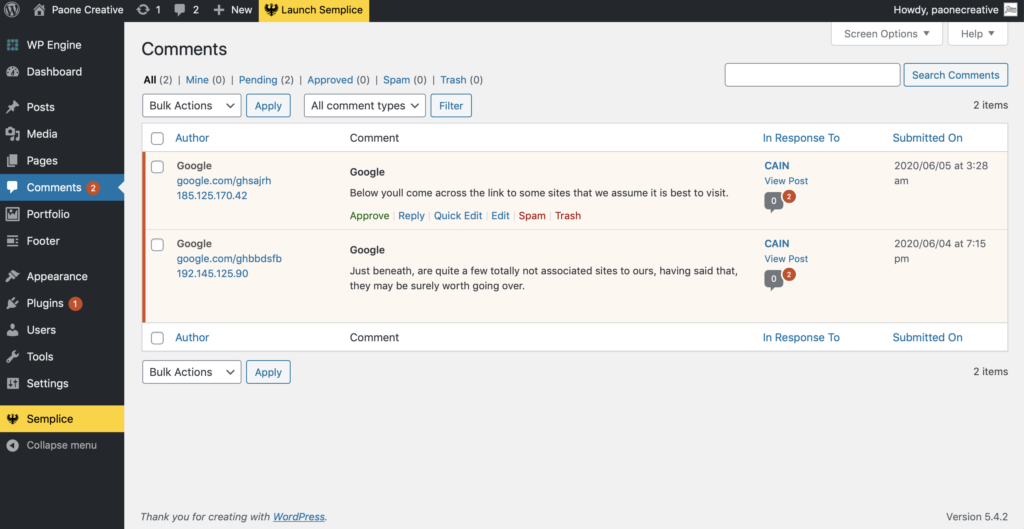
Comments
If you have comments enabled on your website be sure to manage them. Not only do you want to avoid spam or negative comments but this is also a high risk area for malicious attacks on your website.
Even if you do not have comments on your site, you should check the comments tab monthly to delete any spam or unwanted items. Be sure to empty your trash.
Taxonomies
Keep your taxonomies organized! This means keep your categories, tags and any other custom fields organized. Follow the taxonomies outlined in your sitemap (website strategy stage). Also try to limit the categories or tags applied to a post - this will keep your content relevant to the viewer.
Edit A Taxonomy
To edit/add a category, tag or custom field go to:
- Posts > Categories (or: tags, custom taxonomy title...)
- Click ‘edit’ on the title you would like to edit or add new. The following fields are editable:
- Name
- Parent
- If you would like to change the ‘Slug’, note that the old url will no longer work. You should create a redirect or avoid editing the ‘Slug’.
- Description - only appear on some themes.
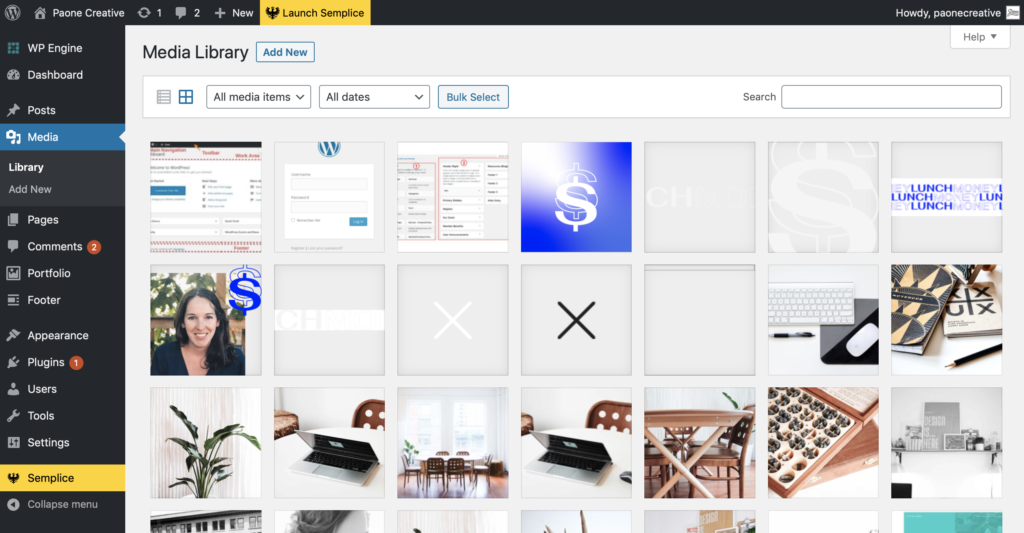
Images & Media
Media consists of the images, video, recordings, and files that you upload and use on the website. To add images to your website, upload your optimized image files to the media library. When you insert/add media to an individual post/page, use these settings:
- Alt Text: Write a description for your image in case it does not load. This is also beneficial for SEO (Search Engine Optimization) and users with disabilities.
- Attachment Display Settings:
- Align: center (unless formatting desired)
- Link to: none (unless custom link desired)
- Size: full (unless you know what size you want)
File Size Rules
- Image file sizes should be 500kb or lower (200kb+ will see load delay)
- Avoid using images provided directly from the photographer, as these are usually high-res for printing (300 dpi). Take those images and reduce the overall dimensions to match the design guide @ 72 dpi.
- Be sure to never upload duplicate images into your media library - you can use the same image more than once.
- Photoshop Users: make sure your image is set to 72 dpi and matches the design dimensions. Click ‘save images for web’ then reduce the .jpg quality (find a balance with low kb file size but without loosing quality).
Reduce File Size Tools
Reducing image file size is a high priority! This will help keep your site speed up and hosting storage space down. Before adding any images to your website make sure the file size is low. Here are some tools to help you reduce image file size:
- Reduce File Size | Web browser: TinyPNG: upload your images and download the new and reduced file. No loss of image will occur - it will just compress the file size.
- Reduce File Size | Mac: ImageOptim: download this app and follow the instructions to drag/drop your images to reduce just the file size.
- Crop Dimensions & Reduce File Size | Mac: QuickScale: download the app to crop your images and reduce file size (see bulk instructions).
Tips to Create Visual Content
Your theme has been built to use very specific image dimensions (sizes). Follow the guidelines when creating images. Images should be uploaded at the size you want them to appear, to remain crisp and of good resolution.
Want to design images/layouts or mix text with photos online? Use Canva.com and setup your own Canva templates to match photo dimensions. Add text, images and create unique layouts to match your brand style guide.
Plugins
What is a plugin?
“A plugin is a bit of software that can be uploaded to to extend and expand the functionality of your WordPress site.” Think of them as a mini app, for your website.
Plugins are a benefit of owning a WordPress website. They let us add complex features with little code or in a short amount of time. The downside to plugins are that they can add bloat, increase security risks and cause conflicts when not used properly. Some plugins are good and some are bad!
It is also important to know that plugins need updating along with the WordPress core to ensure compatibility. Many plugins are managed by a third-party owner. Reputable owners keep their plugins up-to-date. However as time passes, some plugin owners can abandon their work and a plugin will become stale and no longer compatible with the latest version of WordPress. If this happens, it will need to be replaced with an alternative solution.
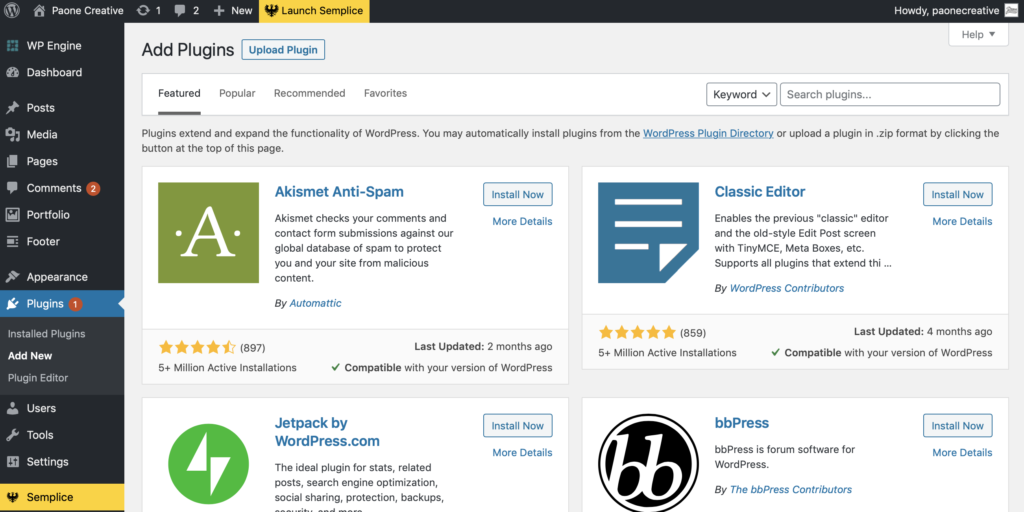
Can I add more plugins?
We only recommend tested and reputable plugins. Be sure not to add unnecessary plugins to your website. Every plugin added can cause complex harm to your site. Talk to a WordPress developer before adding plugins to your site.
How to update plugins?
As with all WordPress updates, backup your site first. Some plugins require a simple 1-click update while others can cause complex harm or break your site. If you are familiar with a specific plugin you can update, only if needed. All updates should be performed by a WordPress developer.
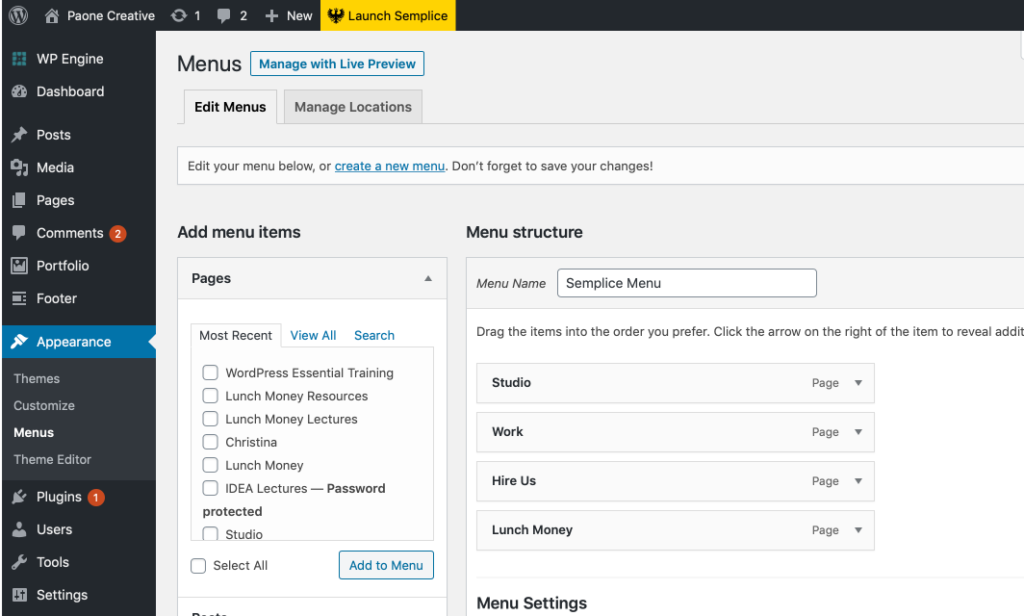
Menus
Your site uses multiple WordPress menus. To edit go to: Appearance > Menus > then on the main page use the dropdown option to select the menu of choice to edit.
You can edit the items in each menu by:
- Choose items from the left (or create a custom url).
- Drag & Drop to 'add' them to the menu area.
- Edit 'Navigation Title' or menu item 'ULR' if needed.
- *Save your work to see the change on your live website.


No comments.